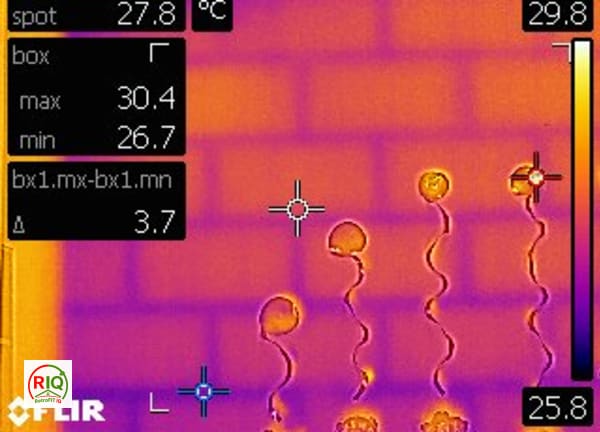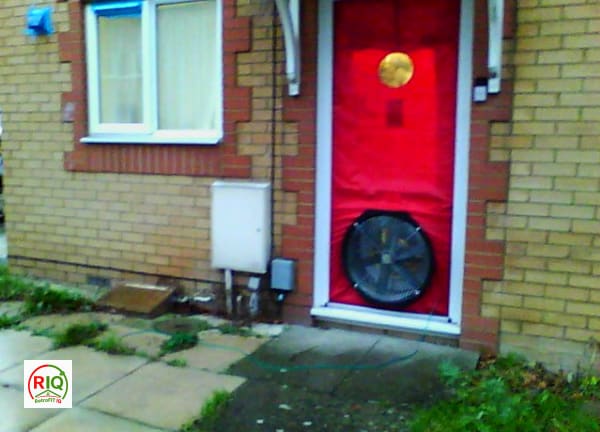

Air leakage is invisible and, in still conditions, often thermally quiet — the small amount of air trickling through a gap may barely register. The trick is to amplify it. By sealing a blower door into a doorway and depressurising the building, outdoor air is forced in through every leak at once. As that cold air streams across the internal surfaces around each leak, it chills them in a distinctive, dynamic pattern that the thermal camera captures clearly.
The signature of a leak
Air-leakage patterns look different from static insulation defects, and learning to read them is the key skill:
| Feature | Air leakage (under depressurisation) | Insulation defect |
|---|---|---|
| Shape | Cold 'fingers', streaks, fans spreading from a gap | Cold patch matching the missing area |
| Behaviour over time | Grows/cools as depressurisation continues | Static — doesn't change |
| Response to the blower door | Appears or intensifies when fan runs | Largely unchanged by the fan |
| Location | Junctions, penetrations, skirtings, hatches | Wall fields, between studs, cavity |
How a combined survey runs
- Establish a sufficient temperature differential (warm inside, cold outside) so incoming air contrasts with the surfaces.
- Seal the blower door into an external doorway and depressurise the building to a steady pressure (around 50 Pa).
- Sweep each room with the thermal camera, watching for cold fingers developing at junctions, skirtings, service penetrations, loft hatches, window frames and sockets.
- Confirm each suspected leak with a smoke pencil at the surface (it should be drawn into the gap), and quantify the significant ones with an anemometer.
- Photograph and annotate each leak, building a prioritised register tied to the blower door's whole-building leakage figure.
This is exactly the workflow described in the Airtightness guide's leak-detection article — thermal imaging and the blower door are two halves of the same technique. The blower door tells you how leaky; the thermal camera (plus smoke) tells you where.
Where leaks show up
- Skirting and floor-to-wall junctions — cold air drawn up from underfloor voids fans across the lower wall.
- Loft hatches and ceiling penetrations — cold fingers spreading down from above.
- Service penetrations — pipes, cables, ducts and downlights, each with a localised cold plume.
- Window and door frame perimeters — cold lines tracing the frame-to-structure gap.
- Electrical sockets and switches on external walls — small cold blooms, especially with dot-and-dab plasterboard.
- Intermediate floor-to-wall junctions — where the floor void connects to the external wall.
Why this matters for moisture, not just heat
The complementary external view — pressurisation
Depressurisation, which pulls cold outdoor air in, is the workhorse for internal leak hunting because the incoming air chills the internal surfaces the camera is watching. But the reverse — pressurising the building so warm indoor air is pushed out through the leaks — has its own use. Under pressurisation, an external thermal survey (in cold weather) can catch warm air escaping at the outer face around junctions and penetrations, and a smoke fogger inside makes leaks stream visibly out for photography from outside. Some components, particularly flaps, overlaps and one-way details, leak differently depending on flow direction, so surveying in both directions catches leaks that a single direction would miss. As with the blower door itself, averaging and cross-checking the two directions gives the most complete picture of where the envelope leaks.
Reading the magnitude of a leak
Not every cold finger matters equally, and part of the skill is gauging significance so the sealing budget goes to the right places. The thermal signature gives qualitative clues — a long, fast-developing, deeply cold fan indicates a strong leak driving a lot of air, while a faint, slow cold smudge indicates a minor one — but the camera does not measure airflow. That is where the anemometer comes in: held at a located leak, it measures the actual air velocity, turning 'there is a leak here' into 'this leak passes this much air'. Combined with the leak's position in the stack-effect pressure field (high-level escape and low-level entry leaks matter most), this lets the survey rank leaks by genuine impact rather than by how alarming they look on screen. A dramatic-looking cold streak near the neutral pressure plane may move far less air than a modest one at the wall head.