
All Investigations

Every project we've documented, in one place.

The complete record of our real building-performance investigations, in chronological order — from the earliest to the most recent. Every entry below is a genuine completed project with its actual diagnostic findings, on-site photos and verbatim customer review. Prefer to browse by discipline? Use the categorised library instead.

Back to the categorised library
5 published investigations · chronological order

Loft & Kitchen Insulation / Draught-Proofing — Diagnostic Survey

Francis · Luton · 15 Dec 2025
Blower Door TestingSmoke TracingThermal Imaging Survey
  1. Step 01
    Customer problem

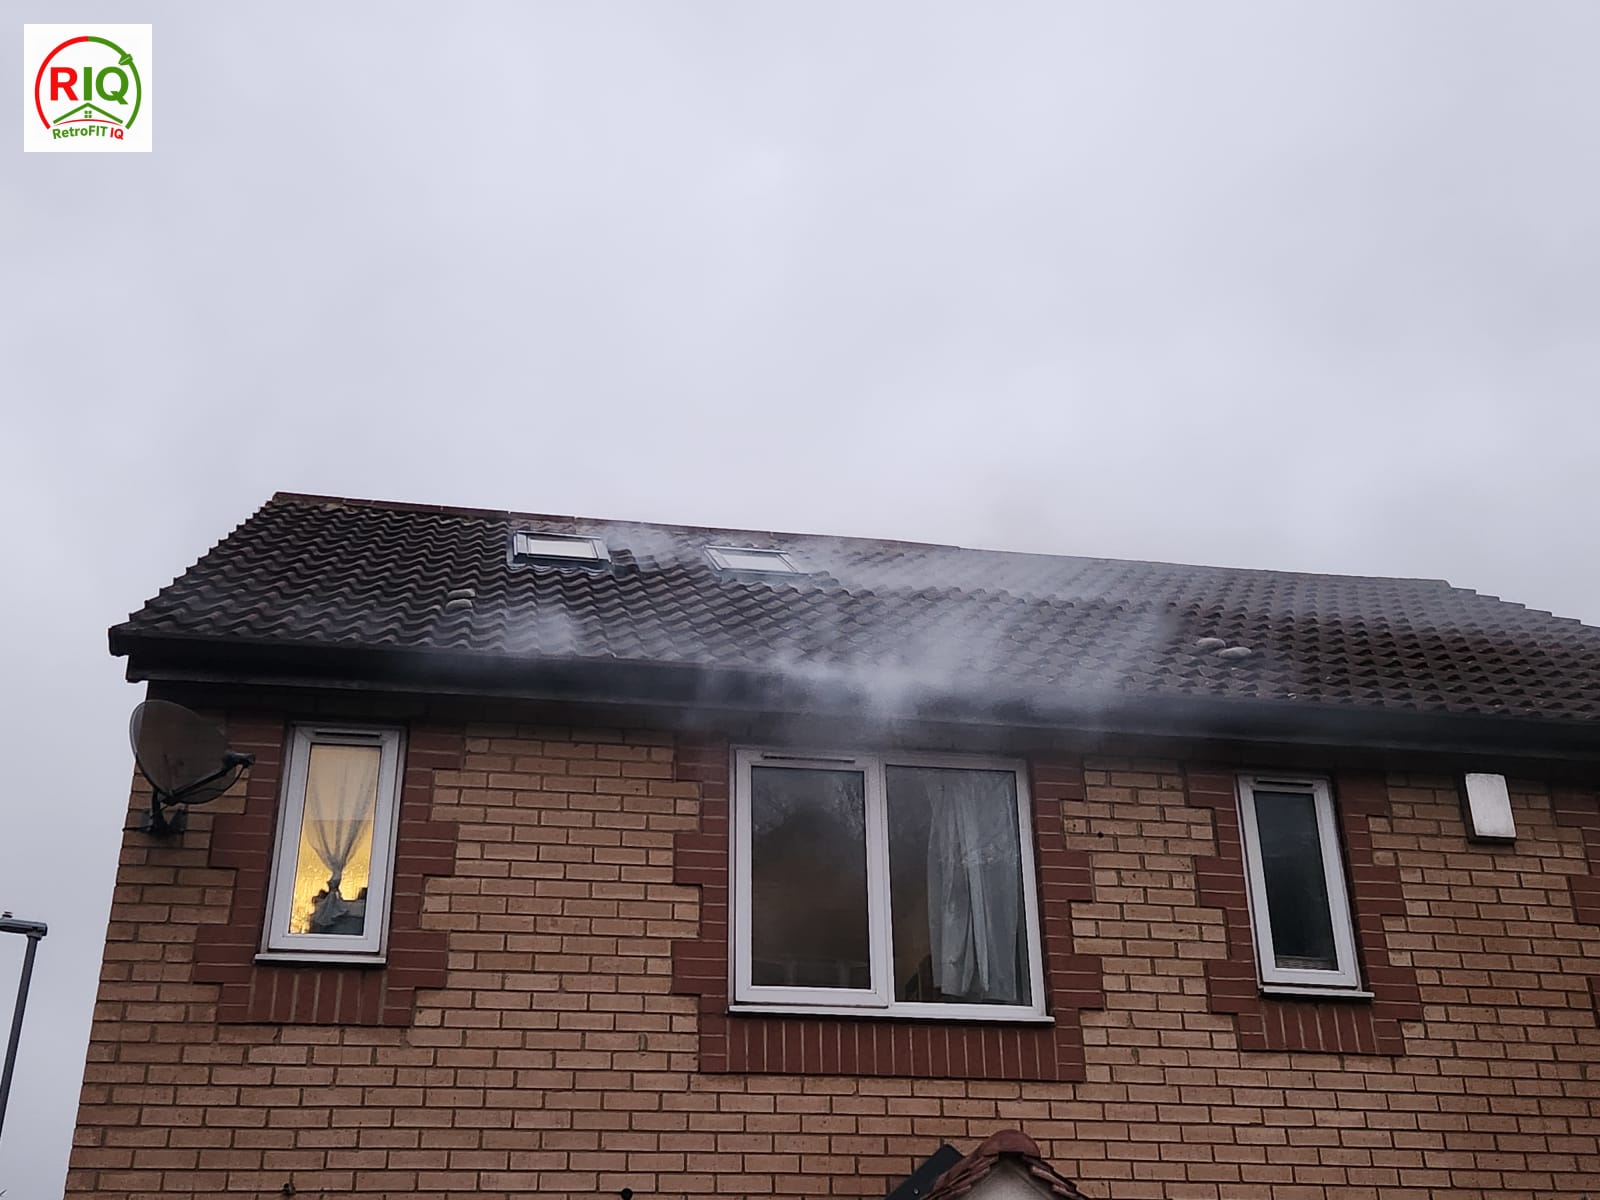
    The customer was looking for a proper diagnostic assessment of their property (loft and kitchen) to understand where air leakage and heat loss were actually occurring, before committing to any insulation or draught-proofing works.

  2. Step 02
    Investigation / diagnostic method

    On-site Home Health Diagnostic Survey combining a blower door test, smoke testing and a thermal imaging survey.

  3. Step 03
    Findings

    The thermal images and smoke tests showed exactly where air leakage and heat loss were occurring. George explained the building physics behind each issue so the customer understood the causes, the risks they create and how they relate to each other.

  4. Step 04
    Solution provided

    A detailed, well-structured written report was delivered, with clear explanations of the causes, risks and recommended remedial options. The recommendations were honest and practical about priorities, costs and what would (and would not) make a real difference.

  5. Step 05
    Outcome achieved

    The customer received a proper diagnostic assessment — not a superficial inspection. They were extremely impressed with the professionalism and depth of knowledge and would have no hesitation in recommending the service.

Real project photos

Photos taken on site during the Francis project — preserved with customer consent.

Internal Wall Insulation (IWI) — Cold Cupboard, Damp & Mould Remediation

Giuliano · Shepherds Bush, London · February 2026
Internal Wall InsulationCelotex / KingspanDamp & MouldThermal Imaging
  1. Step 01
    Customer problem

    A built-in cupboard against an external wall was generating persistent damp and mould — the cold internal surface was sitting below dewpoint on cold days, condensing moisture out of the air and causing the tenant ongoing problems. The property is tenanted, so works needed to be coordinated directly with the tenant around their availability.

  2. Step 02
    Investigation / diagnostic method

    Two pre-works site visits to understand the scope properly (no blind phone quoting), combined with FLIR thermal imaging to confirm the cold surfaces and identify the worst-affected areas. The work was then specified as a full internal wall insulation (IWI) build-up using Celotex / Kingspan-equivalent rigid PIR boards — a hygrothermally aware solution sized to bring the internal surface temperature well above dewpoint.

  3. Step 03
    Findings

    The thermal images confirmed pronounced cold spots and cold bands on the cupboard wall, lintel and reveals — surfaces between 15.7 °C and 17.7 °C against room air of ~21 °C, which is a textbook condensation/mould risk. Two site visits before quoting also revealed the job was trickier than a single day allowed for, so the scope was honestly re-priced to two days rather than rushed.

  4. Step 04
    Solution provided

    Full IWI installation to the cold cupboard: rigid PIR insulation boards (Celotex / Kingspan equivalent) fixed to the cold wall, with airtight detailing at junctions to control vapour movement. Access to the tenanted property was arranged directly with the tenant, working around their availability. Project completed under a 1-year workmanship warranty.

  5. Step 05
    Outcome achieved

    A dry, warmer cupboard with the internal surface now well above dewpoint — eliminating the damp and mould source at the root. The tenant is happy with the solution, the landlord has a 1-year warranty, and the job is signed off via the verbatim MyBuilder review.

Real project photos

Photos taken on site during the Giuliano project — preserved with customer consent.

Property Assessment & Costed Improvement Report — Whole-Flat Diagnostic Survey

Verified Checkatrade customer · IG8, London · March 2026
Property AssessmentBuilding DiagnosticsThermal ImagingCosted ImprovementsBuilding Performance Strategy
  1. Step 01
    Customer problem

    The customer needed a structured, evidence-based assessment of their whole flat — not a tick-box survey — to understand exactly where heat, comfort and indoor-environment problems were originating, and to receive a fully-costed schedule of recommended improvements they could prioritise and budget against.

  2. Step 02
    Investigation / diagnostic method

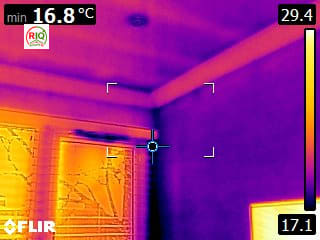
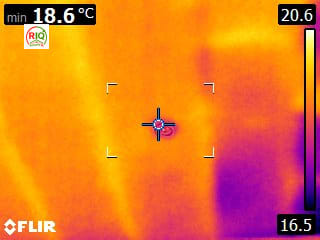
    On-site Home Health Diagnostic Survey of the flat combining: visual inspection room by room, FLIR thermal imaging of all critical surfaces (walls, ceilings, lintels, reveals, floor junctions, service penetrations), surface temperature and humidity readings, defect identification against building-performance criteria, and conversion of the findings into a costed improvement schedule.

  3. Step 03
    Findings

    Multiple thermal defects identified and measured across the flat: localised thermal bridges at wall/ceiling corners (cold spots down to 19.1 °C against room baseline ~21 °C), pronounced cold bands along door-head lintels (16.8 °C → 29.4 °C across the same image), a cooler perimeter band at the wall/floor junction (evidence of a heat-loss path through the slab edge), and uniformly cool internal wall surfaces giving an accurate baseline for the costed-improvement comparison.

  4. Step 04
    Solution provided

    A thorough written diagnostic report was delivered covering each defect, the building-science reason for it, and a fully-costed schedule of proposed improvements ranked by impact and cost. The recommendations covered thermal-bridge mitigation, perimeter detailing, surface-temperature improvement and a wider Building Performance Strategy the client can implement in stages.

  5. Step 05
    Outcome achieved

    The customer received a proper, evidence-based assessment with full costings for every proposed improvement — exactly what they were looking for. They left a 5-star Checkatrade review describing the report as 'very thorough' with full costings for all proposed improvements, and a glowing recommendation.

Real project photos

Photos taken on site during the Verified Checkatrade customer project — preserved with customer consent.

Underfloor Insulation & Soundproofing — Lifted Floor, Insulation Between Joists, New Acoustic Deck

Luke Large · E17, London · April 2026
Underfloor InsulationSoundproofingAcoustic FloorResilient Bars
  1. Step 01
    Customer problem

    The customer needed the existing finished floor lifted so that proper insulation could be installed between the joists — to reduce heat loss into the cold void below and improve airborne and impact noise transmission from the room below.

  2. Step 02
    Investigation / diagnostic method

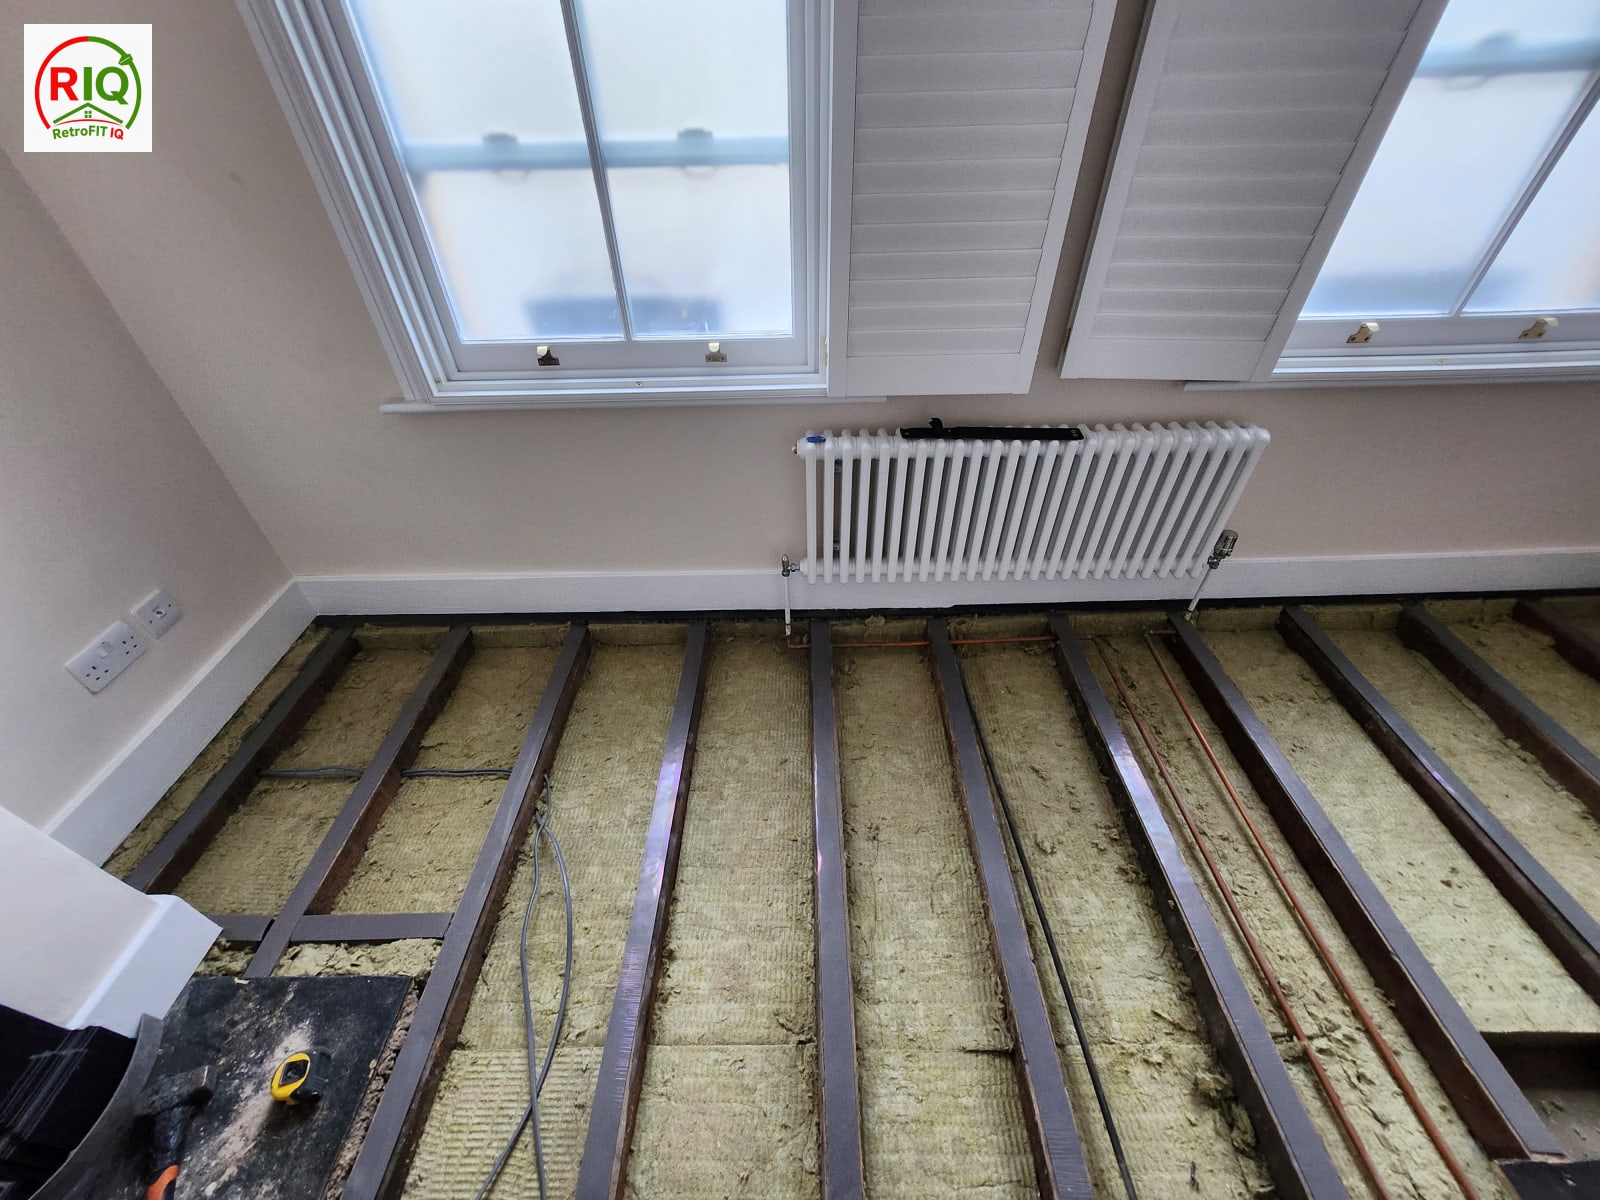
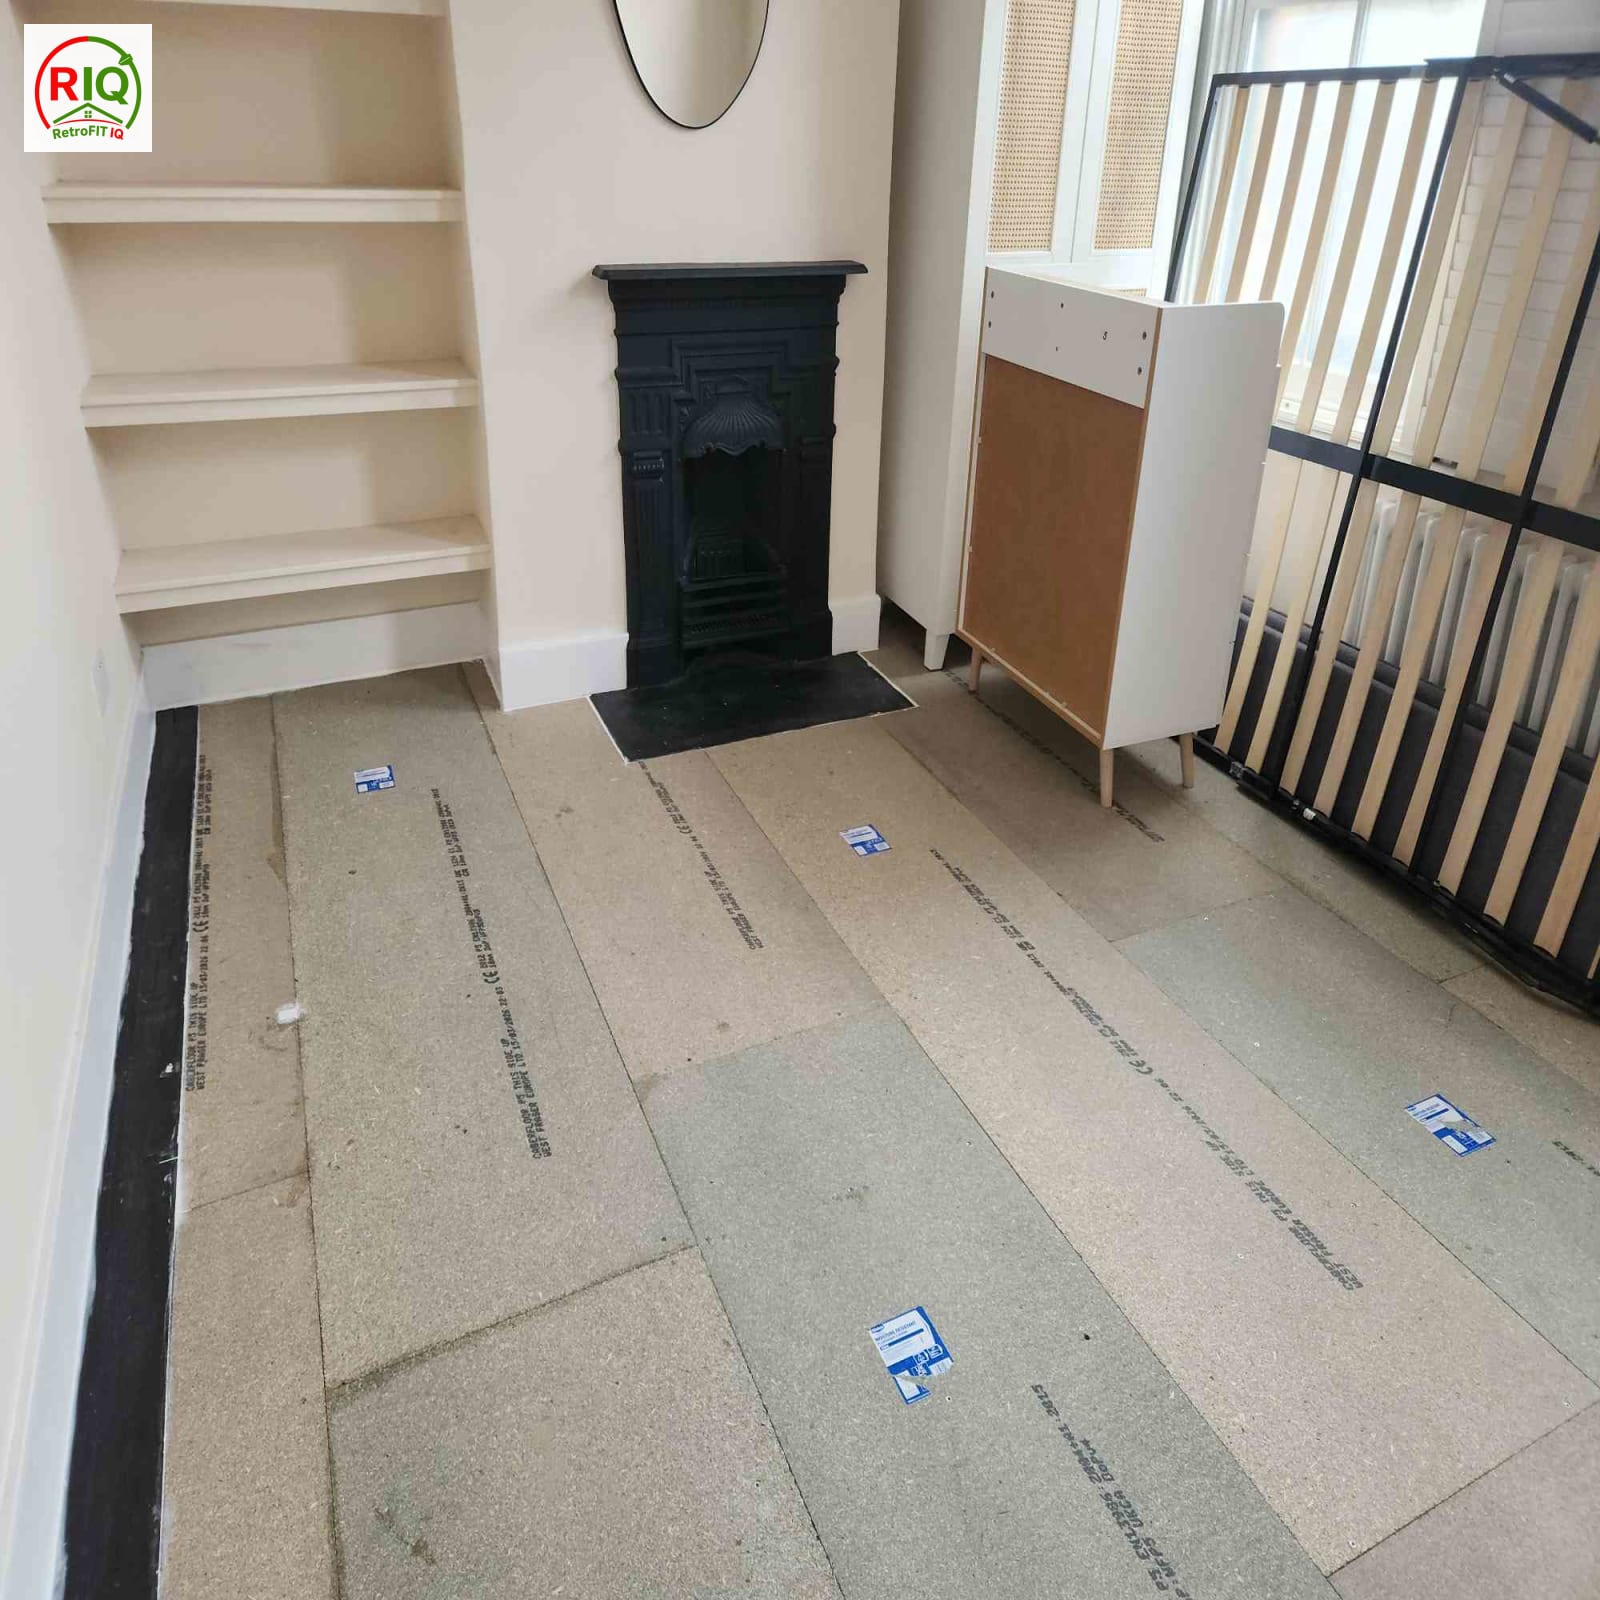
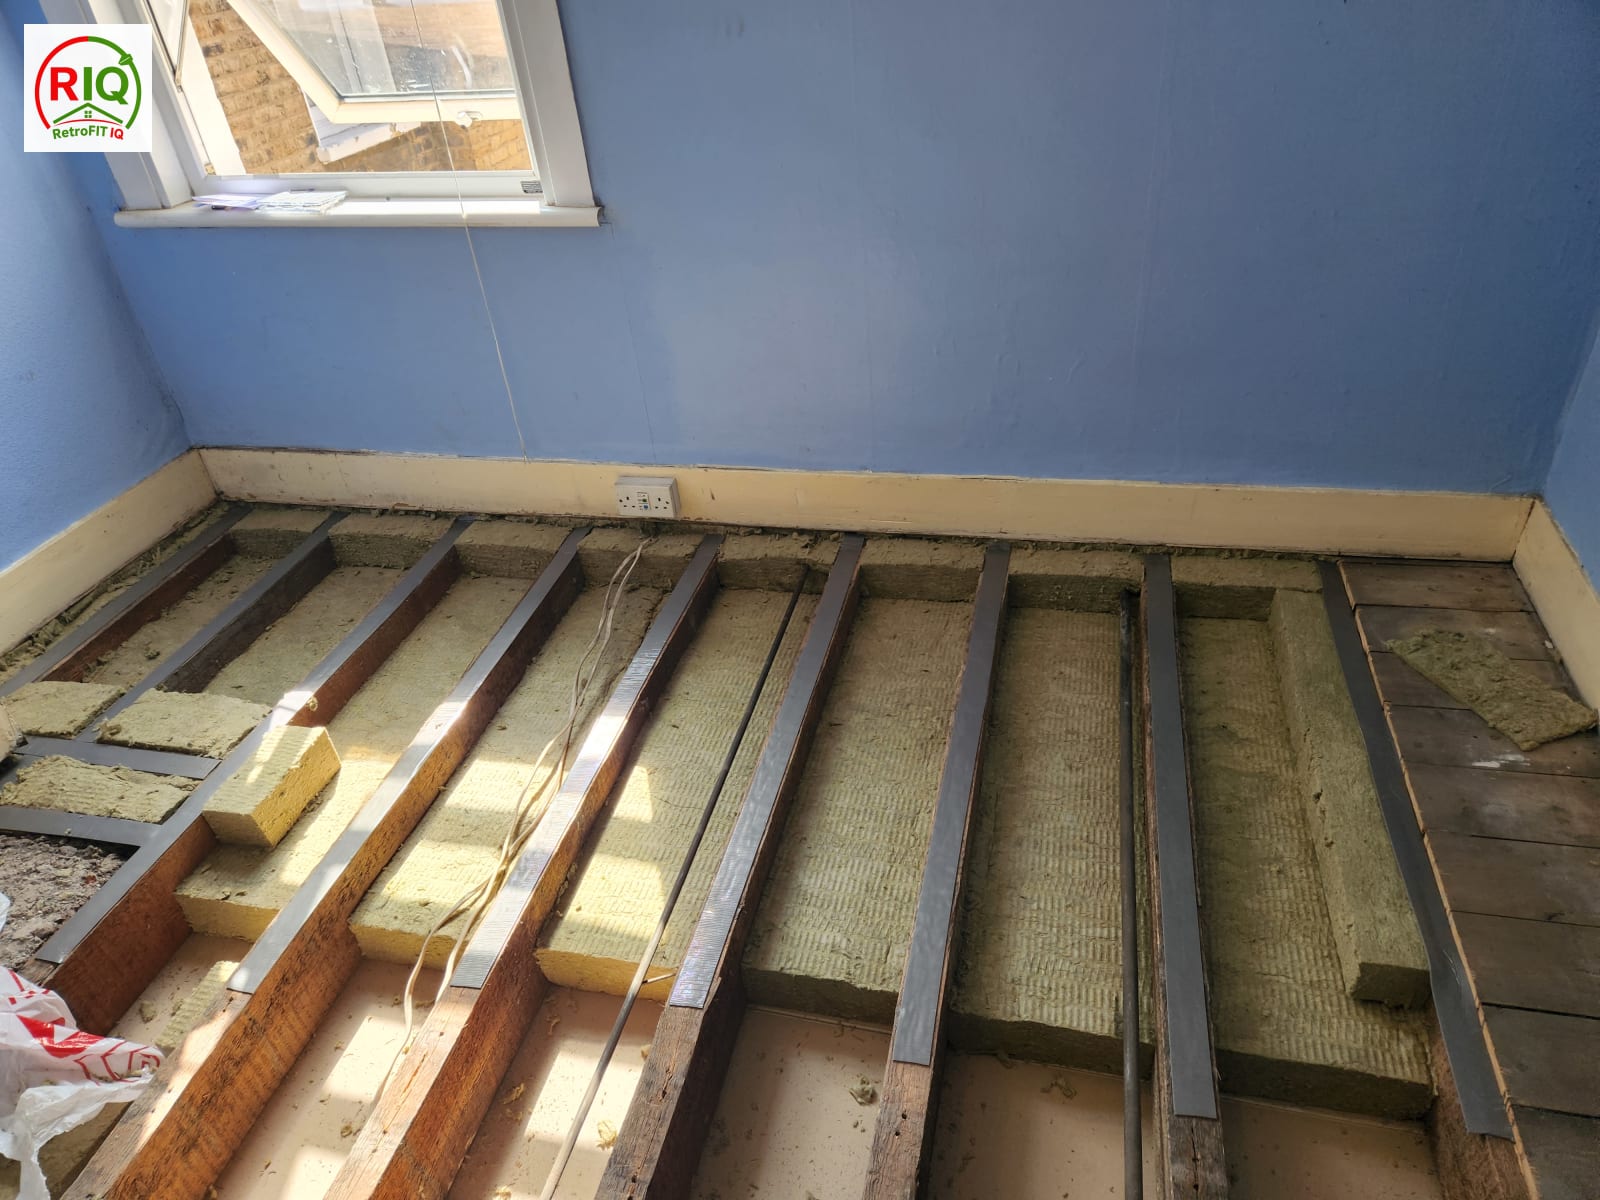
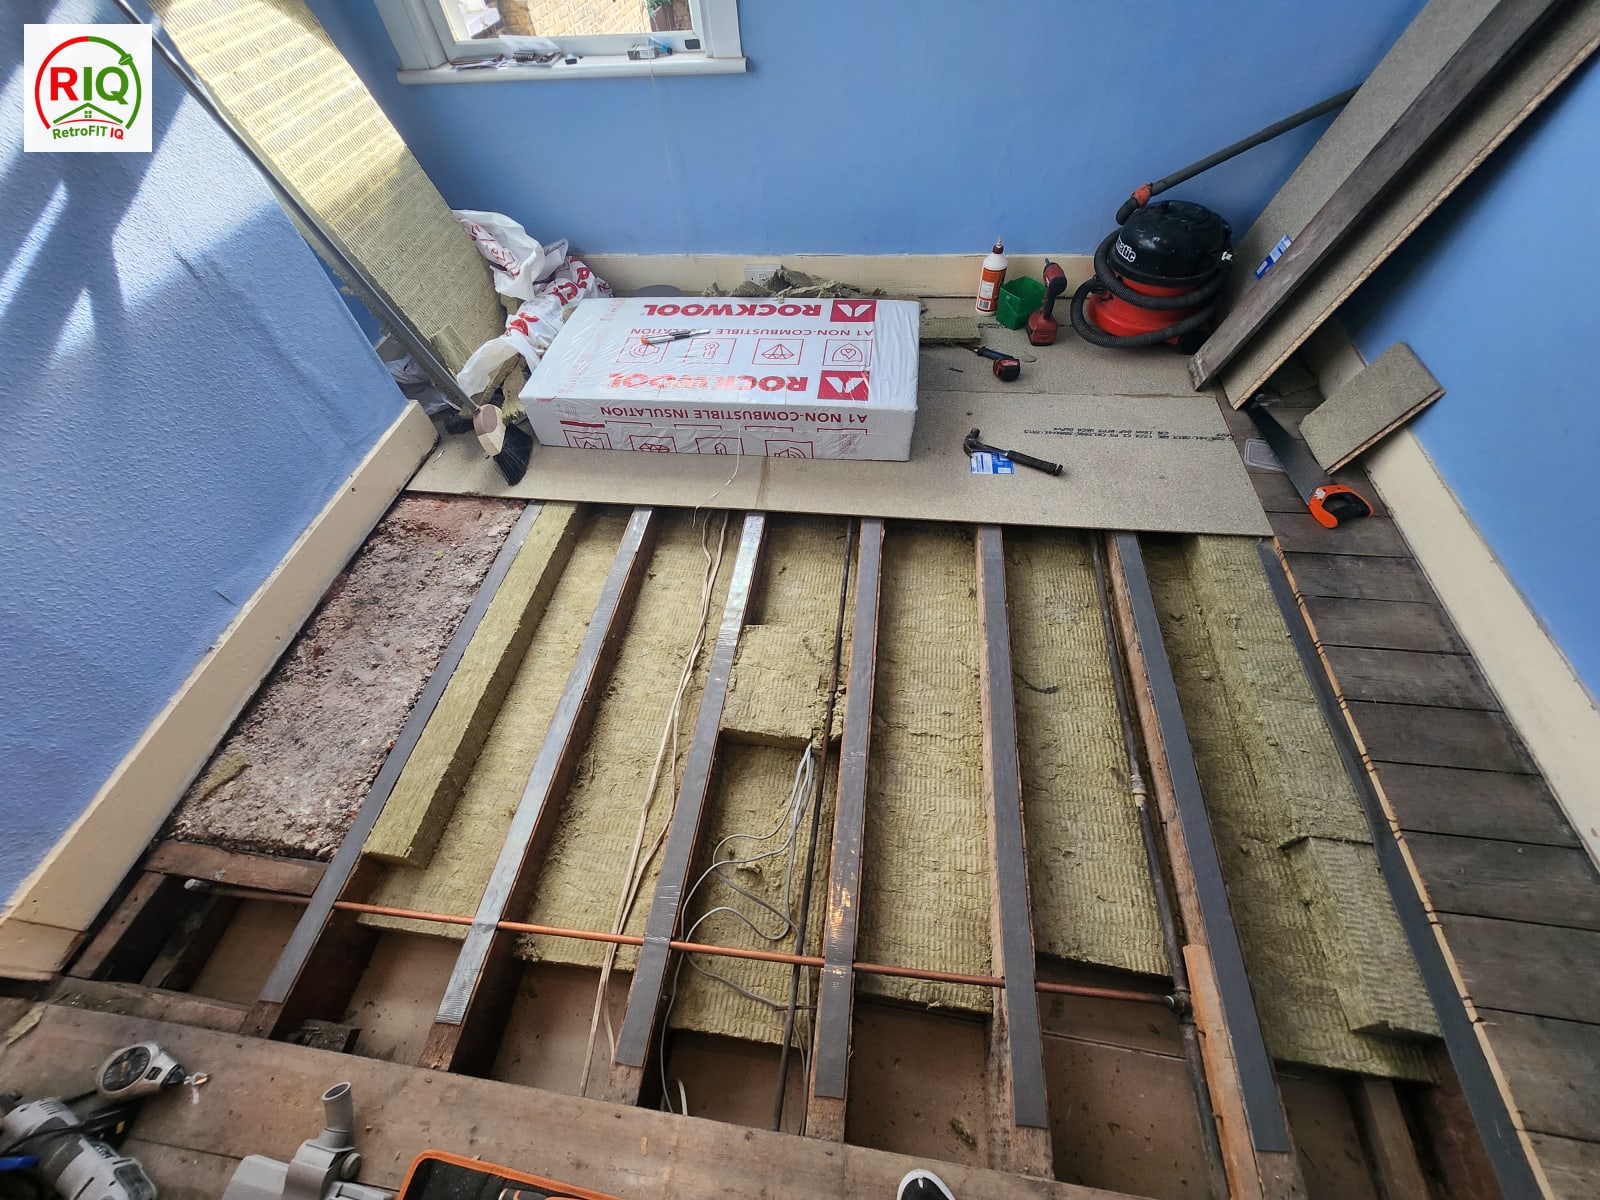
    On-site assessment of the existing suspended-timber floor and the void beneath, followed by a four-stage underfloor build-up: lift existing floor → install mineral wool insulation between joists → fix resilient acoustic bars across the joists → lay new moisture-resistant acoustic boards (RW5 system) as the new deck.

  3. Step 03
    Findings

    The existing floor build-up offered virtually no thermal or acoustic insulation: heat was being lost downward into the void, and sound was transmitting directly through the joists as both airborne and impact noise. The joists themselves were sound and reusable, so the optimal solution was an insulated, decoupled new deck rather than a full replacement.

  4. Step 04
    Solution provided

    Lifted the existing floor and exposed the joists; installed mineral wool insulation between the joists (thermal + acoustic); fixed resilient acoustic bars across the joists to decouple the new deck from the structure; finished with moisture-resistant acoustic boards (RW5 system) ready for the floor finish. Every stage was photographed for the client's records.

  5. Step 05
    Outcome achieved

    A warmer, measurably quieter room with a clean, fully-documented build-up. The client confirmed they would happily reuse RetrofitIQ for similar works or general construction — verified in his Checkatrade review.

Real project photos

Photos taken on site during the Luke Large project — preserved with customer consent.

Multi-Room Acoustic Floor Build-Up + Wall Upgrade — N17

Verified Checkatrade customer · N17, London · June 2026
SoundproofingRW5 Acoustic Mineral WoolResilient BarsAcoustic FloorWall Upgrade
  1. Step 01
    Customer problem

    The customer was experiencing significant airborne and impact noise transmission through the existing timber floors across multiple rooms — voices, music and footsteps from rooms above and adjacent were clearly audible, affecting day-to-day comfort. One bedroom in particular needed both floor AND wall acoustic upgrades.

  2. Step 02
    Investigation / diagnostic method

    On-site assessment of the existing floor and wall build-ups in every affected room, followed by a four-stage acoustic floor upgrade per room (lift existing finishes → mineral wool between joists → resilient acoustic bars → new floorboards → acoustic underlay → new carpet) plus a designed acoustic wall upgrade to the most-affected bedroom.

  3. Step 03
    Findings

    The existing floors offered no acoustic insulation between joists and no decoupling between the upper finish and the joists. Sound was transmitting directly through the structure as both airborne and impact noise. The most-affected bedroom additionally had a direct flanking path through the party wall requiring an independent acoustic wall layer.

  4. Step 04
    Solution provided

    Per room — Stage 1: existing floor finishes removed. Stage 2: RW5 acoustic mineral wool installed between joists. Stage 3: resilient acoustic bars fixed across the joists to decouple the new deck. Stage 4: new floorboards laid, acoustic underlay over, new carpet finished. Additional wall upgrade in one bedroom using independent stud + mineral wool + acoustic plasterboard to break the flanking path.

  5. Step 05
    Outcome achieved

    Measurably quieter rooms across the home with significant reductions in both airborne noise (voices, TV) and impact noise (footsteps). Customer rated the service 10/10 on Checkatrade and confirmed they will be using RetrofitIQ again for further works.

Real project photos

Photos taken on site during the Verified Checkatrade customer project — preserved with customer consent.